How to bulk add sessions?
Bulk importing sessions is an efficient way to add multiple sessions to your event with a single action. Here's how you can utilize the bulk import sessions feature:
Prepare your session data: Gather all the session details you want to import, such as session titles, track, time slots, speakers, and any additional information required.
Format your data: Organize your session data in a compatible format for bulk import. Common formats include CSV (Comma-Separated Values) or Excel files. Ensure that each column in your file corresponds to a specific session attribute, such as title, track, time, speaker, etc.
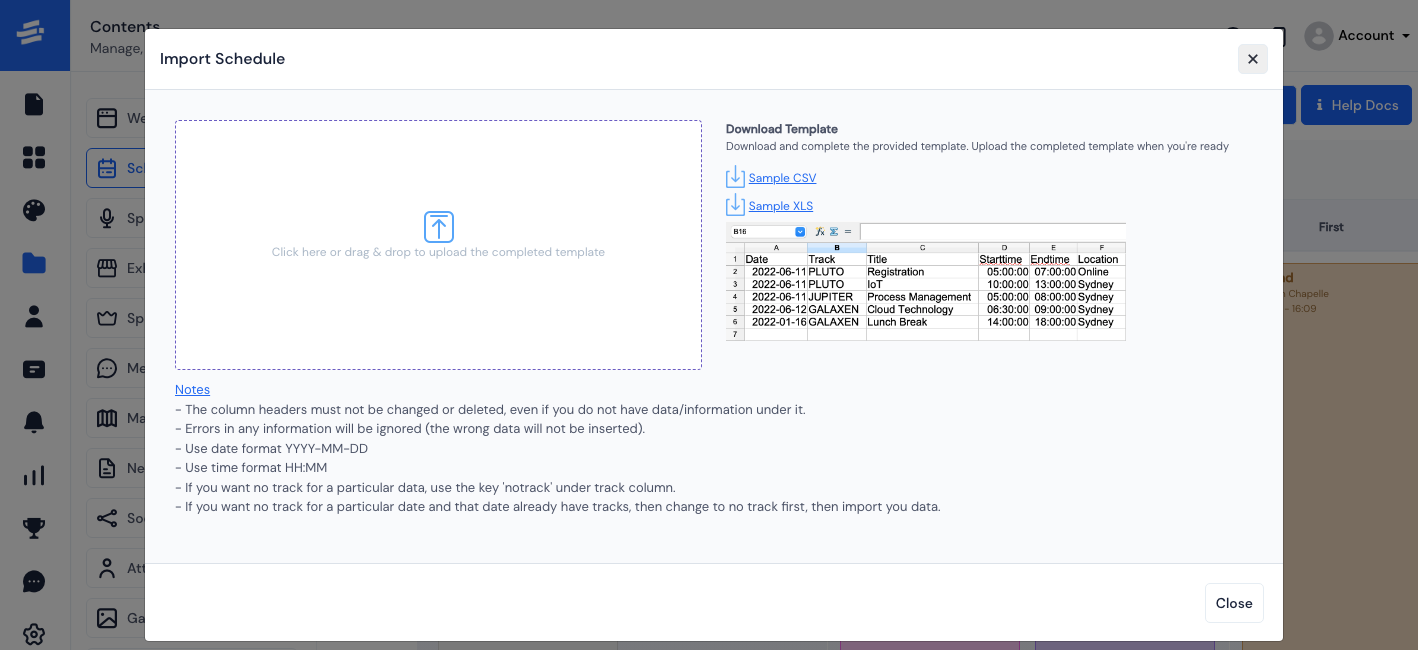
Access the Bulk Import Sessions feature: Within the Eventify Admin Panel, navigate to the Schedule section, and look for the option to import sessions in bulk. This option is labelled as Quick Action >> Import Schedule from Excel.
Upload the file: Use the provided interface to upload the prepared session data file. Follow the on-screen instructions to select and upload the file from your computer or cloud storage (for better understanding go through the given example). Review your data then click the Import button.
Note: Maintain the rules and restrictions given in the Notes section otherwise it will not be uploaded.

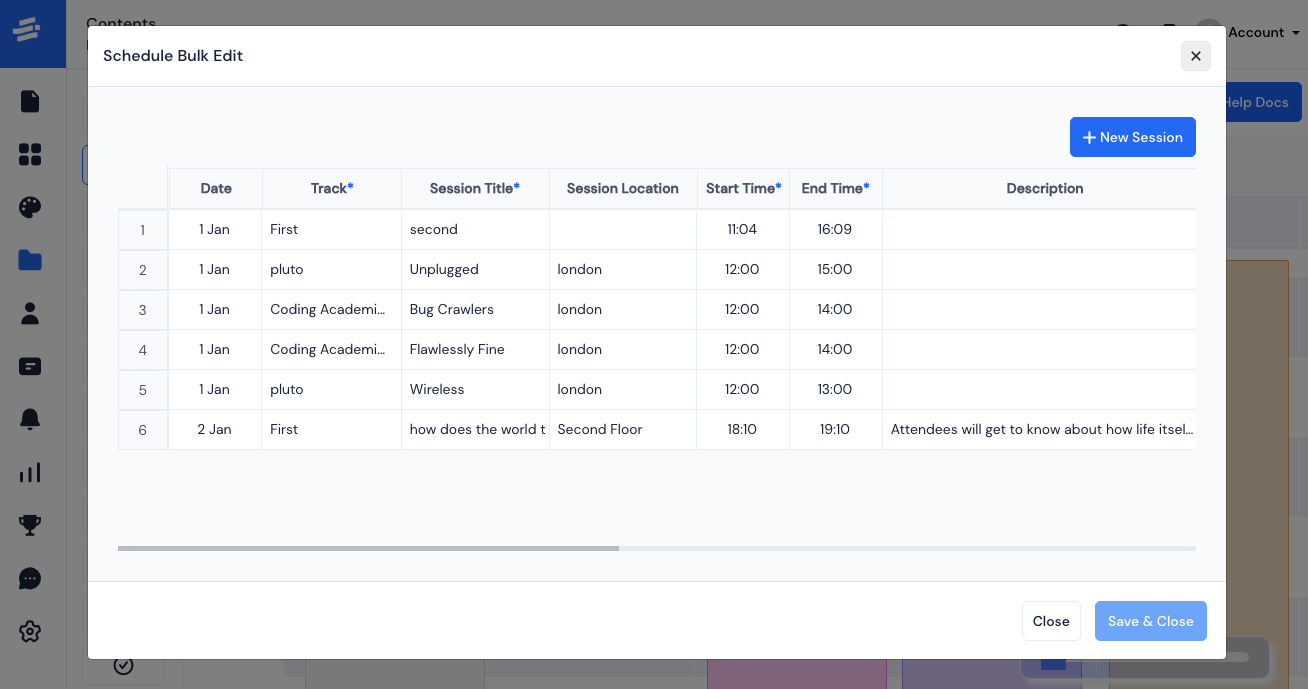
An alternative method for importing all information quickly is available through the Quick Action section. Simply click on "Edit Schedules in Bulk" to access the feature. Fill in the relevant information in the corresponding columns, ensuring accuracy. Once done, click "Save and Exit" to complete the bulk editing process.

Additionally, new sessions can be added by using the "New Session" button located in the top right corner of the "Edit Schedules in Bulk" page. This method provides a convenient way to import and manage session details efficiently.
Bulk import sessions streamline the process of adding multiple sessions, saving time and effort. It enables organizers to quickly populate the event schedule with comprehensive session information.